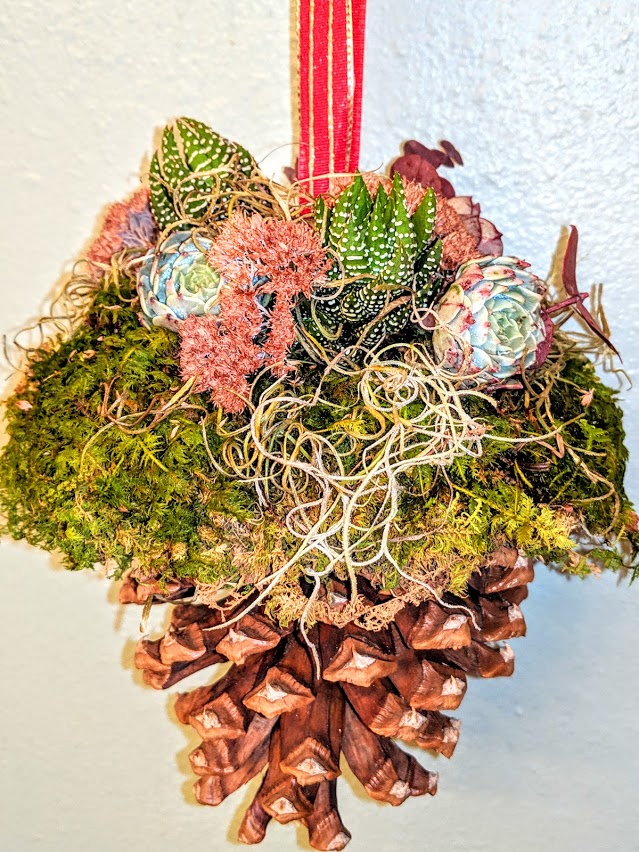
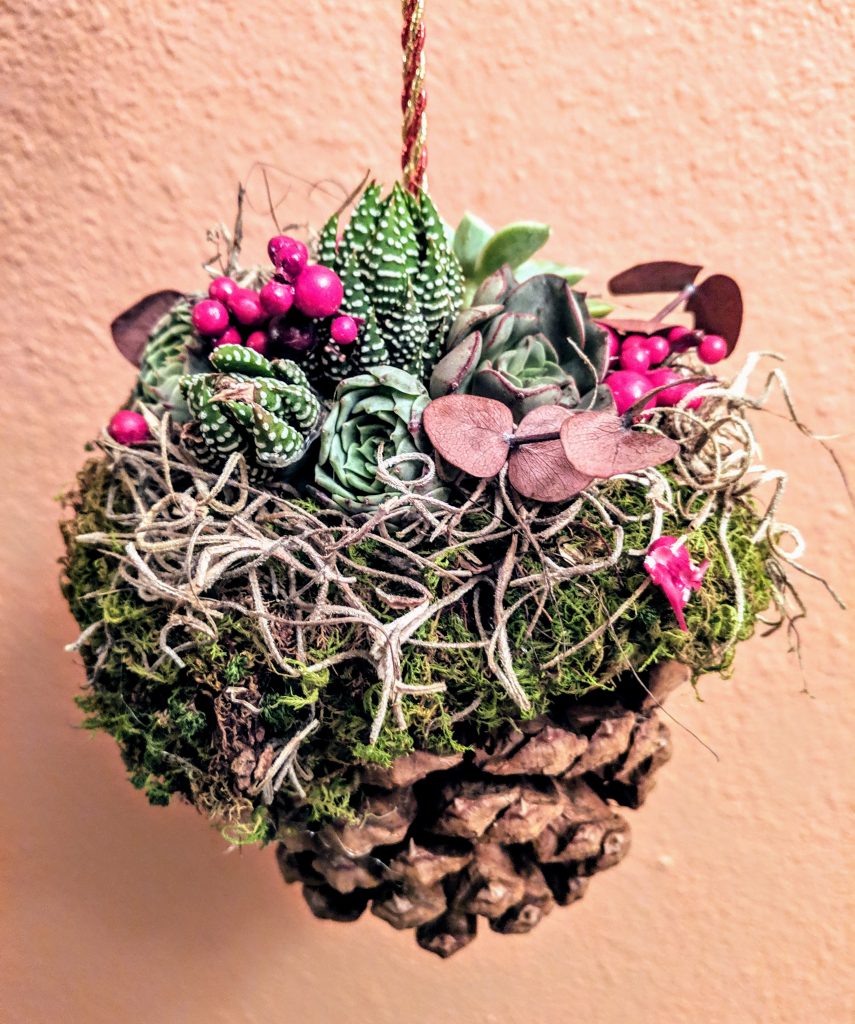
They make great holiday ornaments! It’s easy to create one of your very own! Let me show you how.
Start with a big pine cone
“Jeffrey” pine cones are ideal. They’re big and beautiful! We carry them at Tagawa Gardens as part of our seasonal offerings of greenery and other fresh holiday decorations.
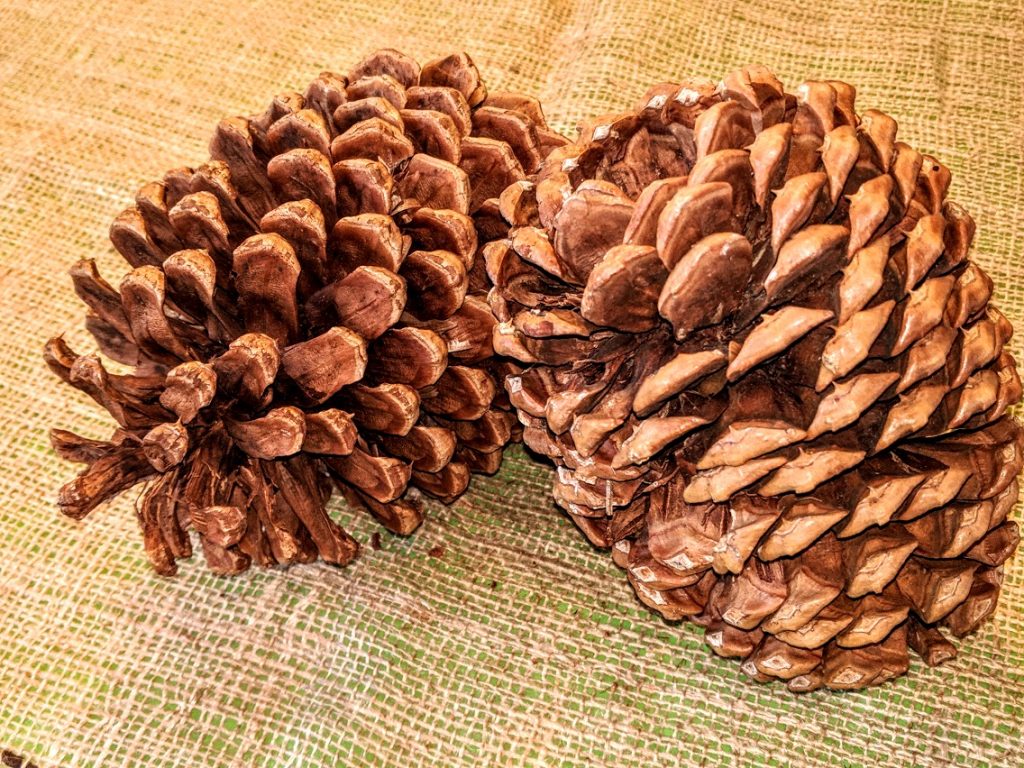
For smaller pine cone ornaments, large Ponderosa pine cones can be used, too.
Prepping the pine cone
We need to create a flat working surface on the bottom of the pine cone, where it was attached to the tree. That’s where we’ll add some moss and the tiny succulents.
Look for the pine cones that with scales on the bottom that have opened and expanded. These cones were fully mature when they were harvested. That makes it easy to remove the lowest rows of scales to create the flat space that we need.

Pine cones that weren’t fully mature are still closed and tight on the bottom. Their scales are too hard to pry off. The base of these cones could be trimmed with a saw, but I think working with the more mature, open cones is a lot easier.
Grab your pliers and go!
The first step is to pull off the lowest two or three rows of scales. Needle nose pliers make the job especially easy because they can reach down into the center of the cone and snap off the scales.
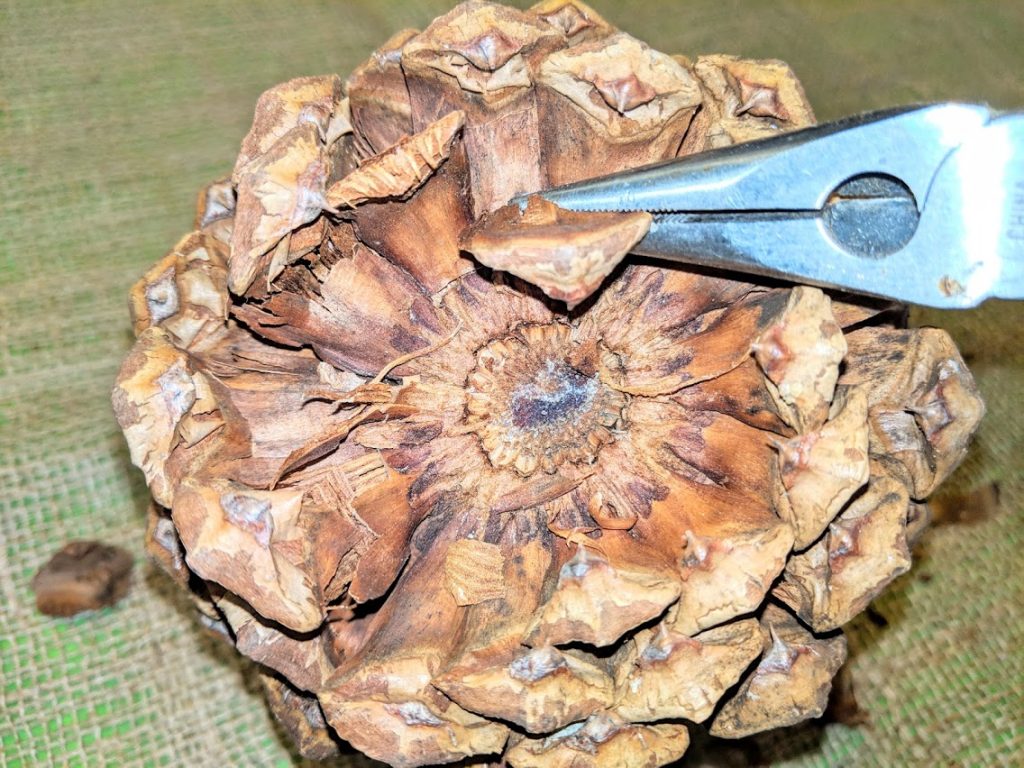
The goal is to create a flat, open surface at the widest point of the pine cone. The scales the begin to curve inward from that widest point should be removed.
Next, a tiny screw eye
Assuming you want to hang your finished ornament, you’ll need to insert a tiny “screw eye” into the center of the cone. That center point is fairly soft and corky, but I’ve found that the screw eyes go in much straighter if I drill a very tiny “pilot hole” first. A simple hand drill will do the job just fine.
If you want to display your ornament on a table, in a small pot or decorate stand, no screw eye or ribbon is needed.
Time for glue and a bit of sheet moss
Set your pine cone into a straight-sided bowl or small flower pot to hold it upright while you work.
With a glue gun (using cool hot glue) or with any clear quick-drying glue, attach a flat piece of sheet moss to the top of the pine cone. If needed, use two layers of moss to create a nice, half-inch cushion. Let some of the moss drape slightly over the sides of the cone. Tagawa’s sells sheet moss in our Houseplant and Foliage Department.

If you’re hanging your pine cone, now is the time to string some decorative ribbon through the screw eye. I usually use about a two-foot length of ribbon. Tie off or glue the ends of the ribbon to make a sturdy loop.
And now for the succulents!
Select several small succulents to decorate the top of your pine cone. We have an assortment of succulents in our Fairy Garden Boutique and elsewhere in Houseplants and Foliage. If I’m using the smallest succulents, measuring about an inch to an inch-and-a-half across, I can usually fit about seven of them onto the top of the pine cone. If I’m using slightly larger plants, I may go with three or five.
This next part can seem a little scary…
If the little succulents have well-developed root systems, they won’t fit down into the moss on top of the pine cone, so most of the roots need to go! The day before I “plant” my pine cone, I make sure they’ve been well-watered, then I trim off the roots with a razor blade, leaving about a 3/4″ stub of the stem.
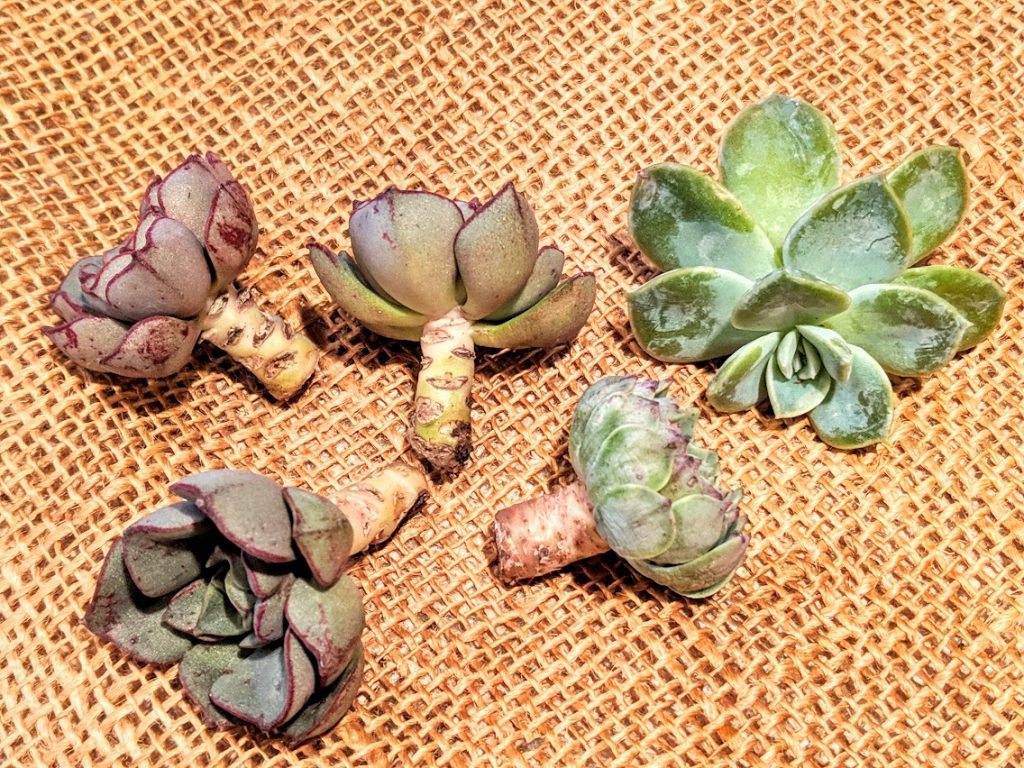
I want that cut edge to air dry, away from direct sun, before I put the succulent into the moss. That creates a callous that seals the stem and helps prevent decay when the succulents are watered.
Time to “plant”
I use a chopstick to create a hole in the moss, then one by one, I glue the tiny succulents onto the top of the pine cone…. tallest and largest succulents in the middle, smaller succulent tucked in next to them.

The quick-drying glue or cool hot glue will secure the plants fairly quickly.
As you go, make sure the plants aren’t keeping the ribbon from hanging freely.
A few finishing touches?
Once your succulents are in place, you may want to use the chopstick to tuck in a few wisps of Spanish moss here and there just for a little added texture. The Spanish moss will stay in place without any glue.
Tiny bits of eucalyptus or a few artificial berries can be nice, too. It’s your little arrangement! Make it what you want it to be!
T.L.C., but not too much!
Most indoor succulents need bright, indirect light. Morning sun is purr-fect! Avoid hot or cold drafts.
Water with a spray bottle, directing the jet of water to the base of the plants. Spraying the whole arrangement is okay, but not necessary, as long as the bases of the plants are getting sufficient moisture. Depending on where the succulent pine cone is being displayed, watering once a week should be sufficient. Succulents definitely do not like to be over-watered!!
Time to enjoy!
Whether you keep them or give them away, these little ornaments are fun to make. With proper care, they could last several months. Once the holidays are over, you can lift and separate the strongest of the succulents and plant them in a shallow dish with cactus mix.
Once your succulents have been removed, save the pine cone! It will be ready for new succulents next year!