Want to grow an easy crop that will impress your friends? Grow garlic!
A lot of folks in Colorado (including myself) love garlic. And fortunately for us, garlic loves Colorado!
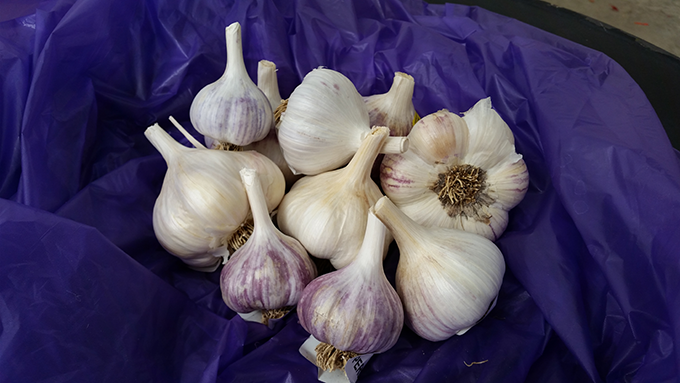
One of my favorite things about gardening is giving some of the harvests away. That’s especially true with garlic. Friends and family enjoy receiving tomatoes or herbs, but there’s just something about a big beautiful head of garlic. It’s like a special surprise treat!
So if you love garlic…. or know people who do…. Tagawa Gardens is the place to be!
Be fussy. Grow only gourmet garlic!
The garlic we sell at Tagawa’s bears little resemblance to what you can buy at the grocery store. This is gourmet garlic, and it’s in a league of its own.
We’re offering dozens of varieties, some of them in limited supply, so shopping early is a must.
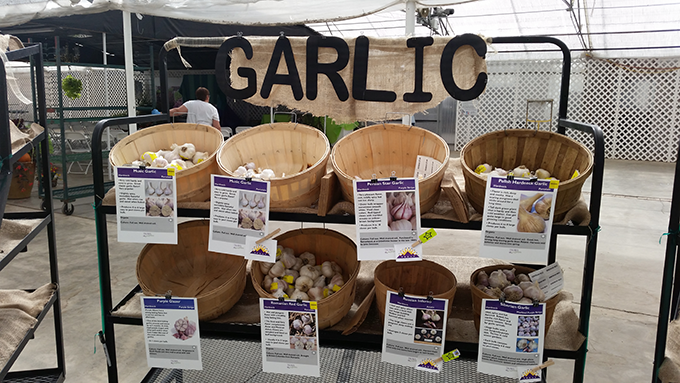
The tough part about growing garlic is choosing which varieties to grow. The gourmet garlic we carry have names as beautiful as the bulbs. “Penasco Blue” is described as “wonderfully aromatic and mild enough to eat raw.” “Chamisal Wild” was “gathered from a creek bank on an old homestead in the Sangre de Cristo mountains in New Mexico.” “Ajo Rojo” is “mild and creamy baked, but watch out raw!” And “Georgian Fire” is “described by chefs as a truly ‘white hot’ garlic!” Woah! This is a garlic-lovers paradise!
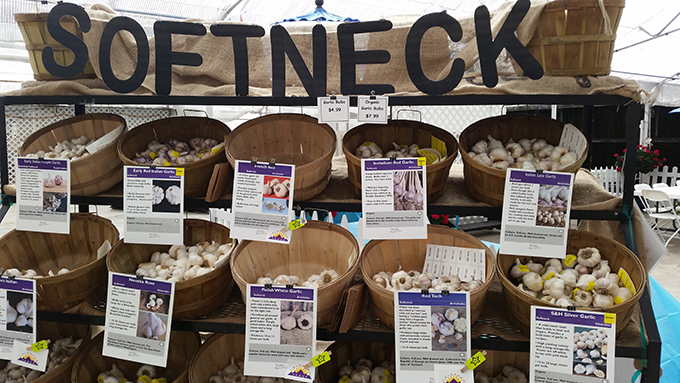
All of our bins of garlic have signs with excellent pictures and detailed information about each strain. Once you’ve chosen which varieties you want to grow, it’s helpful to use your smartphone to take a picture of the signs so you have a record of your selections and know just what to expect.
The time to plant garlic in Colorado is now!
Garlic loves Colorado because our winters give it the cold period it needs before it starts to grow in earnest next spring. Plant in early fall, while the soil is still warm. The daytime temperatures will encourage good root growth and give your garlic plants a chance to establish themselves before winter sets in.
You may see a few green shoots emerge before the plants go dormant for the winter. Not to worry! That’s perfectly normal. The growth will kick in again when temperatures start to climb in May. The exposed shoots rarely show any signs of damage from the cold, and any snow is a bonus!
Plant your garlic in late September or October, in a sunny spot. At least six hours of full sun is ideal. A little bit of light shade during the hottest part of the afternoon will be fine, and may actually produce slightly larger bulbs.
Work some compost into the bed before you plant. Garlic likes a rich, loose soil. Excellent drainage is a must! I grow my garlic in raised beds to help overcome the challenges of Colorado’s clay soil. I till a few inches of compost into the beds every season since good soil is always a work in progress. Lightly rake in a high-quality bulb fertilizer just before you plant.
Remember how I said choosing the variety was the toughest part?
I wasn’t kidding. To make your choice easier, let’s look at the two basic types of garlic you can choose from.
“Softneck” garlic is what you see in garlic braids. The neck or stem of softnecks is pliable, allowing the leaves to be braided before they dry. Very mild forms of softneck are what you usually find in the grocery stores.
Softnecks have thicker skins and can be a bit more difficult to peel. But those heavier skins also give the softnecks a longer shelf life, averaging around five months if stored properly.
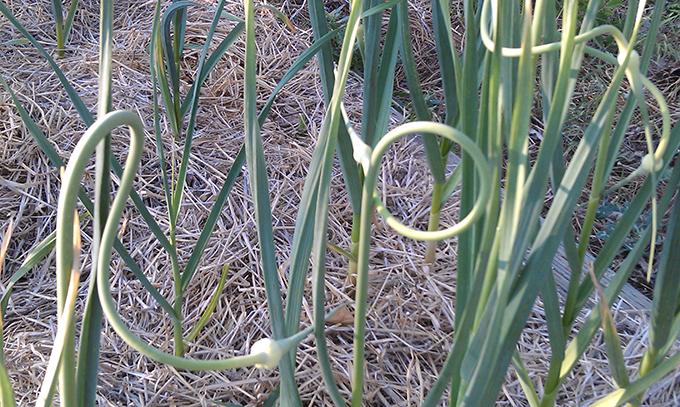
The “hardneck” varieties of garlic tend to have more intense, complicated flavor. Their stem is woody, and usually produces a flower stalk called a “scape.” This wonderful tall spike will often turn into a complete curley-cue after it emerges in the spring.
The experts say that removing the scape before it starts to straighten will concentrate the plant’s energy and make bigger bulbs. Sometimes I leave a few of these whimsical flower stalks in place just because they make me laugh. The harvested scapes are full of nice garlic flavor and make good additions to dishes like stir-fry and soup. It’s best not to let the mature seeds spread on their own. You could end of with dozens of tiny garlic plants where you may not want them.
The hardnecks have thinner outer skin than the softnecks. That makes them easier to peel but also gives them a shorter shelf life than the softnecks. Hardnecks will keep for an average of three to four months if properly stored.
Plant the lovely cloves pointing up to the sky
When it’s time to plant (late September or early October along the Front Range), break the bulbs apart gently. Open or “crack” the bulbs when you’re ready to plant. You don’t want the individual cloves to begin to dry out before they go into the soil.
Plant only the largest, plumpest cloves. The bigger the clove the bigger the bulb it will produce. Tuck the cloves into your prepared site with the flat side of the clove down and the pointy side up. The tip of each clove should be about three inches below the soil surface.
Plant the cloves about six inches apart. Planting them closer makes it difficult to harvest without damaging adjacent plants. Be sure to mark the rows as you plant with something sturdy that will identify which variety is which. I use and re-use old-fashioned wooden survey stakes. When they’re pounded well into the ground, they stand up to winter weather. A fresh coat of white spray paint after each harvest and they’re good as new.
Water the bed deeply once you’re done planting. That will help settle the soil around each clove and get them off to a good start while the temperatures are still mild.
Mulch the beds heavily as the air temperature begins to drop. I use a six-inch layer of pine needles. They’re light and won’t pack down, which is critical. And they’re free!
You can also use a heavy layer of clean, loose straw. The point is to mulch the beds with something that won’t compress, so moisture can get through to the plants. The mulch will keep the bed insulated over the winter. It will also help discourage weed seeds from sprouting next spring.
If the winter weather goes dry, I’ll drag a hose down to my garlic beds and give them a good drink. The top growth may be taking a break, but I still don’t want those lovely little plants below ground to go too dry. Remember to apply enough water to soak down through the mulch and into the soil several inches. Water, then gently lift the edge of the mulch and poke down into the soil to make sure the moisture is penetrating down to the garlic plants’ root zone.
Need some help planting? Here is our garlic planting video featuring Kris, from Peaceful Desert Homestead!
Spring and early-summer care
Proper watering during spring and early summer is critical. I made a point to water my beds especially deeply and consistently this past season. As a result, I grew the largest bulbs my garden had ever produced. Certain varieties were almost as big as tennis balls! Yea!
Be sure to check the moisture in your beds on a regular basis so you know when it’s time to water. The mulch will help conserve moisture, but you still don’t want your beds too wet or too dry.
When you do water, water deeply! Check to make sure the moisture is getting down several inches where the garlic roots can use it. Don’t just be watering the mulch or the top inch or two of soil. Your bulbs will suffer in both size and taste.
Bring on the harvest!
First-time garlic growers can do everything just right and then drop the ball when it comes to harvesting. So here’s the scoop on when and how to bring in your crop.
Most garlic grown along the Front Range will be maturing in mid- to late July. Because of this summer’s heat, some of my garlic was ready to harvest a couple of weeks earlier than normal. But you don’t want to leave any of them in the ground too long or they’ll mature so much that they split open into separate cloves. That makes them much harder to harvest and and they won’t store nearly as well.
Ideally, start gradually cutting back on your watering a few weeks before harvest. Garlic plants, like most other plants, “talk” to us. We just have to listen. When the very lowest leaves begin to turn yellow, and then dry completely, the plant is winding down its season. The watering should wind down, too, and then stop, so the bulbs can begin to harden off.
When about one-third of the plant’s lowest leaves have turned from green to brown, it’s time to harvest. In our heavier soils, pulling the garlic by the stalk won’t work. The stalk will break off, leaving our beautiful garlic crop right where it grew.
Never try to harvest your garlic by pulling them out of the ground! Unfortunately, our soil isn’t likely to let go them that easily. Instead of pulling on the garlic, use a garden fork to gently pry up the bulbs and then lift them out.
Go slow. Be careful to dig between the plants so you don’t skewer the bulbs themselves. Damaging them is easier than you might think. It’s painful to lift out a big, beautiful bulb that’s been impaled during harvest.
Once they’re up, don’t leave the harvested bulbs lying in our hot Colorado sun. The bulbs are very tender at this stage and can burn easily. As I harvest my garlic, I lay the bulbs in a large tray or tub and cover the whole thing with a towel to keep them shaded until I’m done.
The last step…
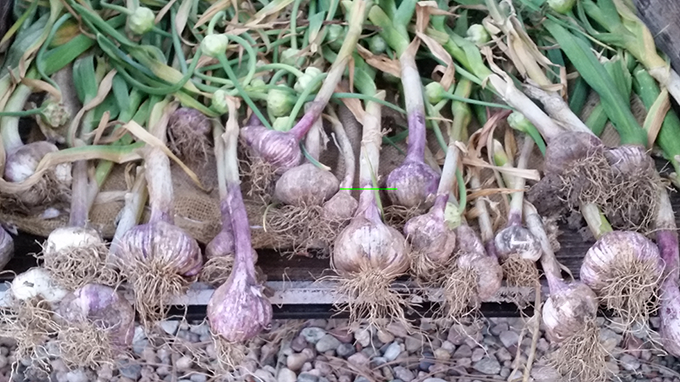
Working out of the sun, gently remove any loose soil, trying not to disturb the outer papery skin of each bulb. Don’t wash the garlic! You’ll just slow down the curing process.
Leave the garlic bulbs and stems intact while they cure. You can tie several of them together in a bundle and hang them in an out-of-the-way place or lay them out flat. No direct sun, but plenty of good air circulation in purr-fect! Proper curing improves the flavor and increases shelf life significantly. In three to four weeks, all of the leaves should be dry and brittle. That’s when you can cut the stem down to within an inch of the bulb and trim the roots.
Store your lovely garlic in mesh bags in a cool place…. never in the refrigerator! Or start giving them away and earn the love and devotion of friends and family.
Remember to save the bulbs with the biggest, fattest cloves to use as seed garlic for the next crop. Or, if you use every bit of garlic you grow, or give it all away, simply come see us again at Tagawa’s to start this garlic adventure all over again!
