With the possible exception of Clark Griswold’s lavish display of lights in the movie “Christmas Vacation,” there may be no better way to bring a splash of holiday cheer to your home than with a beautiful porch pot full of fresh greens and a little… or a lot… of bling!
I’d also argue that assembling your own big “bouquet” of greenery is therapeutic at a time of year when most of us could use a bit of de-stressing. Creating a porch pot gives us a chance to breathe in the fragrance of pine, cedar and fir, and to feel the softness of the cool boughs in our hands – and of course, to stand back and appreciate the beauty of our work once we’ve finished.
Porch pots are getting more and more popular!
Tagawa Gardens is lucky to have Brenda, a twenty-year veteran of the floral industry, who’s been designing both in-house and off-site plantings for Tagawa’s for three years.
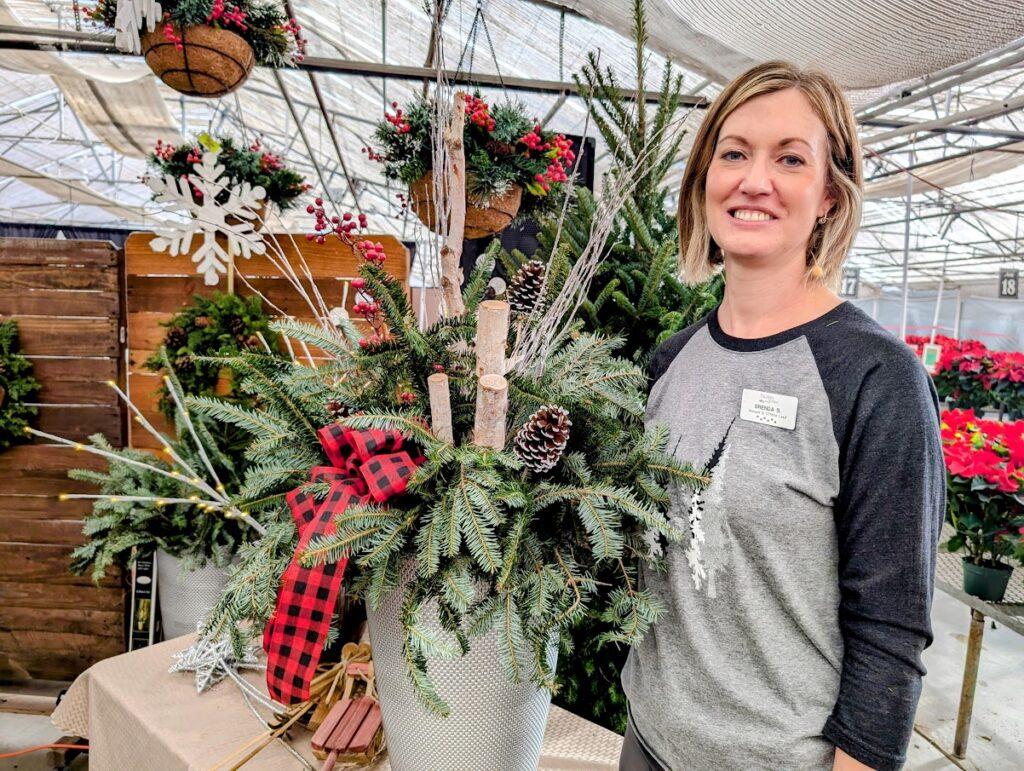
We’ve kept her busy this season teaching over 90 pre-registered Tagawa guests how to make their own porch pots. At the end of each class, her eager students are all smiles as they load up their creations and head home.

Aside from the therapeutic pleasures of the fragrance and feel of the boughs, it’s obvious that the creative process also delivers a big dose of fun!
If you’d like to tap into your own creative juices, I’ve gathered detailed “how to” notes from Brenda’s classes. With an abundance of boughs and bling just waiting for you at Tagawa’s, let me walk you through her creative process.
Step #1: Bundles of greens
Brenda starts with a hefty bundle of newly-cut fraser fir boughs.
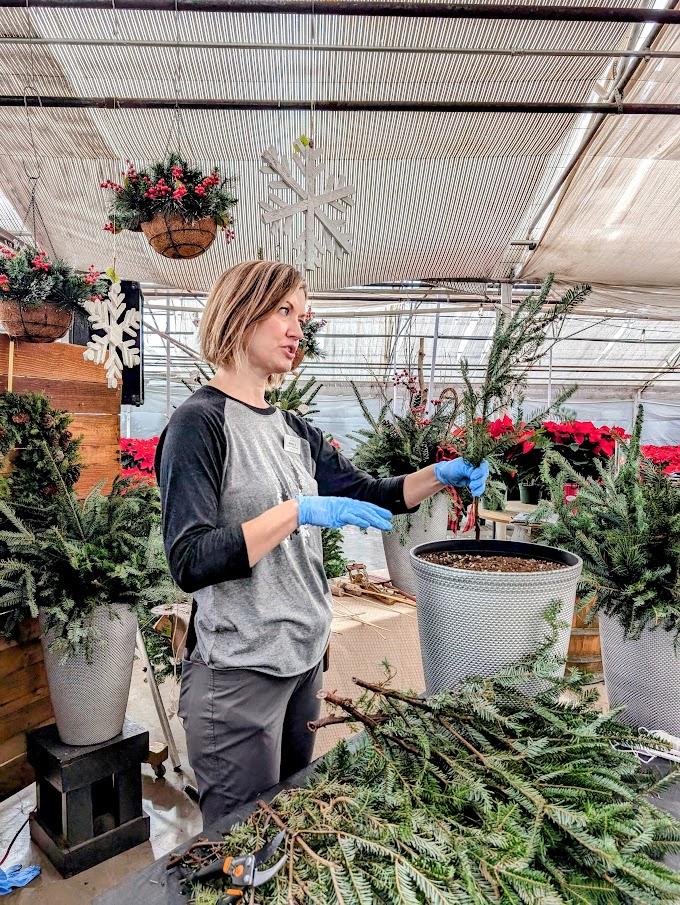
She selects three of the tallest and straightest boughs to form the center of her design. She inserts them into the soil back to back, creating a tight triangle. Note: with all of the greens Brenda uses, she makes a point to trim off any small twigs on the lower five to six inches of the stem, something I hadn’t done in the past, so lesson learned. Removing those small twigs means the boughs can go into the soil cleanly, without dislodging the position of other boughs already in the soil
Brenda makes a point of using a special touch that Mother Nature has given to Fraser fir. They’re green on the upper side and a lovely silver on the under side. Alternating which side of the boughs she uses gives a beautiful contrast to the final look of her design.
Step #2: Greens that spill over the edge of the pot
As you’re building a porch pot, it might help to think of creating a “bouquet” of sorts: taller elements in the center, graceful draping touches around the lowest edges and lots of lovely greens tying it all together in between.
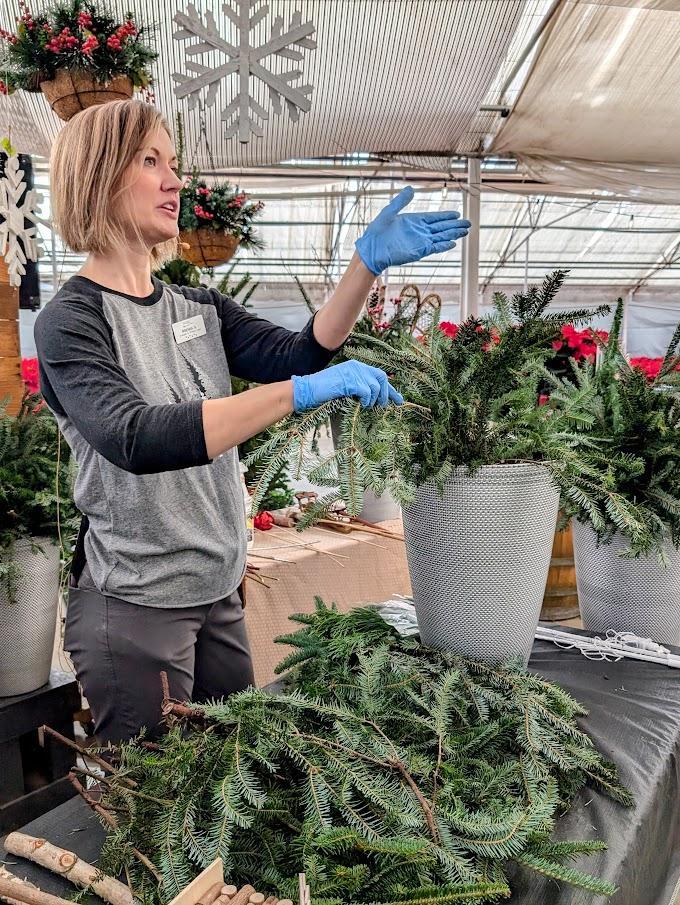
With the three anchoring pieces in place in the center of the pot, Brenda begins to insert several shorter pieces at a steep inward angle, all the way around the rim of the pot. She likes to put these greens in silver side up to add to the contrast mentioned above.
Step #3: Fill it in, here, there and everywhere!
With the center boughs and the “spillers” in place, it’s time to fill! fill! fill!, but there’s a catch. Select boughs that will maintain the desired silhouette of the design and insert them sideways. Make a point to alternate those sideways boughs: green/silver/green/silver. Both the sideways technique and the alternating colors will give the finished porch pot interest and depth.
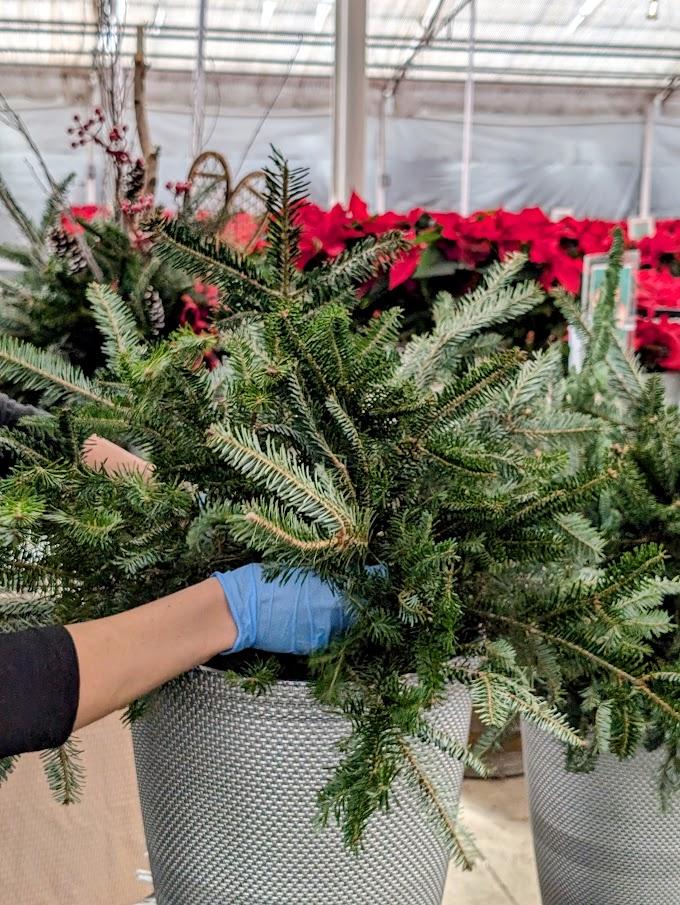
The classes Brenda’s been teaching use a tall pot that measures about 14″ across at the top. With that size of a container, she aims for a finished planting of about two feet tall (above the soil) and two feet or a bit more across. Larger pots can accommodate larger designs. Remember that part of the height can be accomplished with a tall decoration, as we’ll see in a moment.
Step #4: Almost time to bring on the bling!
With all of Brenda’s special tips and touches, the porch pots created with just the bundle of fir greens look full and lovely, but Tagawa’s does have other greenery that can be added to create a bit more personality, if you like.

The straight-needled greens you see here are called “Princess pine,” one of my favorites. We also have (while supplies last) boughs of Incense cedar, Silver fir, Douglas fir and more. They all smell wonderful!
Step #5: Now for the bling!
In addition to other varieties of pine and fir, Tagawa’s offers birch poles, bows, pine cones, berries, lights and seasonal signs along with small outdoorsy decorations like little log cabins, skis, sleds, and snow shoes, as seen below.

Note: Before you add the bling, if that’s what you choose to do, be sure to spray all of your greens, top and bottom, with a product called “Wilt-Stop.” It’s a spray made primarily of purified pine resin. It’s organic, biodegradable, and non-toxic and will go a long way toward keeping your porch pot greenery from drying out as quickly as it would otherwise.
With Brenda’s guidance, making a porch pot for your home is easier than you might think! Tagawa’s has all the materials you need. Just don’t forget to take it slow, breathe deeply, and enjoy the creative process!
From all of us at Tagawa Gardens, the very best of the holidays to you and yours!

